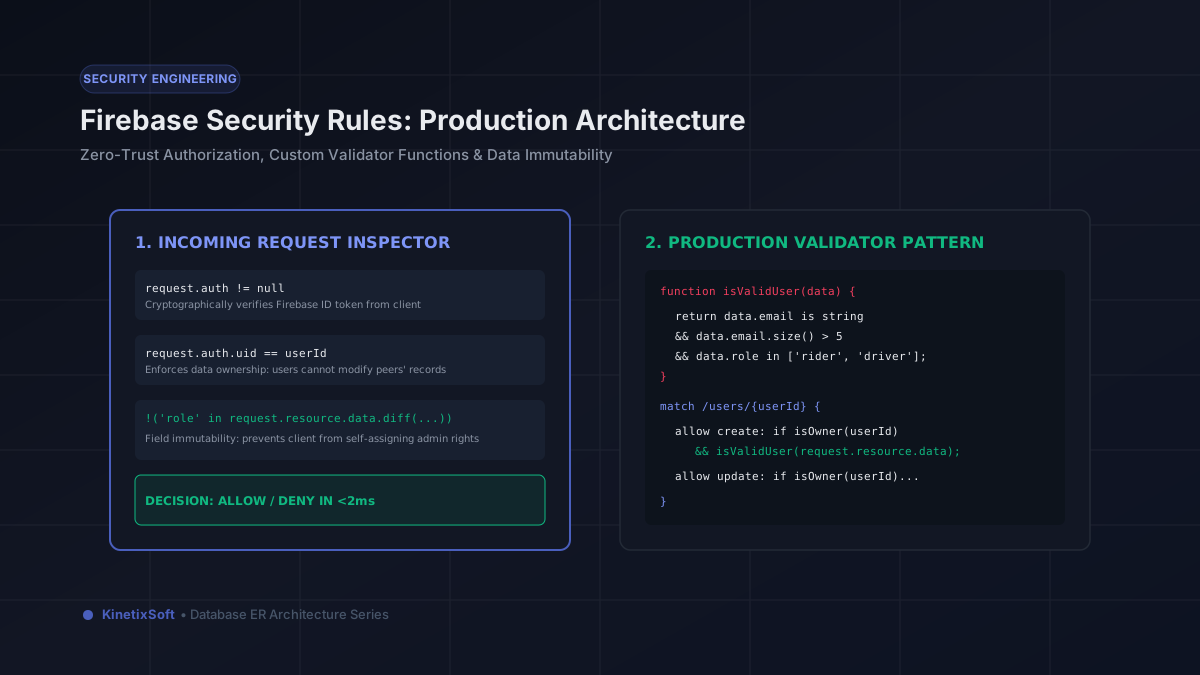
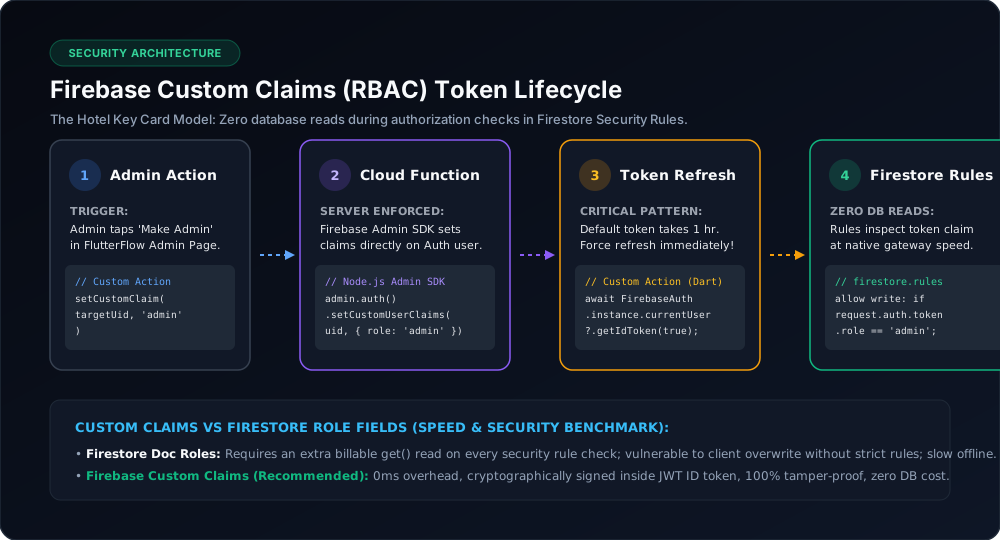
FlutterFlow Stripe Integration: All 4 Production Scenarios (One-Time, Subscriptions, Connect & Pre-Auth Holds)

Monetizing a mobile or web application requires more than dragging a generic "Pay" button onto a canvas. Depending on your business model—whether you are selling digital products, managing a SaaS subscription tier, operating a multi-vendor marketplace, or running an on-demand ride booking platform—the underlying payment architecture differs dramatically.
At KinetixSoft, we frequently audit FlutterFlow projects where developers committed catastrophic security blunders: passing transaction amounts directly from the client device, storing Stripe secret keys in client-side headers, or failing to verify webhook HMAC signatures. If a user can inspect your network traffic and rewrite a request from $100.00 to $0.01, your payment integration is fundamentally compromised.
In this comprehensive engineering guide, we unpack the exact architectures, serverless Firebase Cloud Functions, and FlutterFlow Action Flow configurations required to implement all four major Stripe payment scenarios securely.
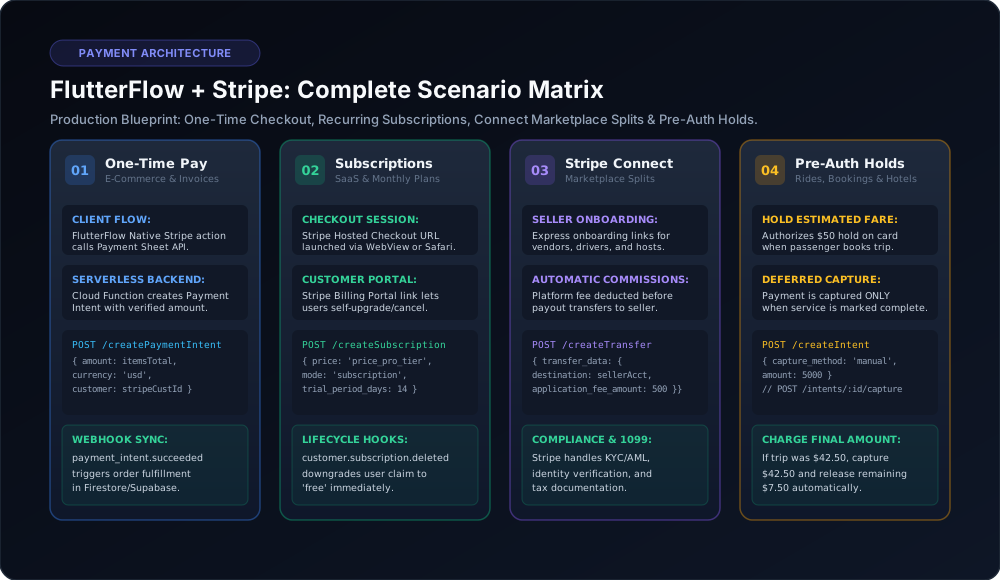
Core Security Rule: The Client Must Never Decide Prices
Before implementing any Stripe scenario, understand the foundational tenet of payment engineering:
The client device (the mobile app) must NEVER tell Stripe how much money to charge.
If your FlutterFlow app queries a product collection, sees an item priced at $50, and calls an API endpoint with { amount: 5000 }, a malicious user can intercept that request via a proxy tool (such as Charles or Proxyman) and change the amount to { amount: 100 } (charging $1.00). Instead, the client must pass only product IDs and quantities (e.g. { items: [{ id: 'prod_123', qty: 2 }] }). A secure serverless backend calculates the total from verified database records and creates the Stripe PaymentIntent.
Scenario 1: One-Time Checkout & Invoices
Ideal for e-commerce stores, physical merchandise, paid PDF downloads, and consulting invoices.
The Architecture:
1. User adds items to their in-memory cart (App State).
2. User taps "Checkout". A FlutterFlow Action calls a serverless Firebase Cloud Function: createPaymentIntent.
3. The Cloud Function fetches current prices from Firestore/Supabase, sums the total, creates a Stripe PaymentIntent, and returns the client_secret.
4. FlutterFlow's native Stripe Action launches the native iOS Apple Pay, Google Pay, or Credit Card Payment Sheet.
5. Upon successful payment, a Stripe Webhook updates the order status in your cloud database.
// Firebase Cloud Function (Node.js)
const stripe = require('stripe')(process.env.STRIPE_SECRET_KEY);

exports.createOneTimePaymentIntent = functions.https.onCall(async (data, context) => {
  if (!context.auth) throw new functions.https.HttpsError('unauthenticated', 'User must be signed in.');

  const { itemIds } = data;
  let calculatedAmountInCents = await calculateServerVerifiedTotal(itemIds);

  const paymentIntent = await stripe.paymentIntents.create({
    amount: calculatedAmountInCents,
    currency: 'usd',
    customer: context.auth.token.stripe_customer_id,
    metadata: { userId: context.auth.uid },
    automatic_payment_methods: { enabled: true },
  });

  return { clientSecret: paymentIntent.client_secret };
});
Scenario 2: SaaS & Recurring Subscriptions
Essential for premium memberships, B2B software tiers, and monthly wellness passes.
For subscriptions, the recommended approach is utilizing Stripe Checkout Hosted Sessions combined with the Stripe Customer Billing Portal.
• Checkout Flow: When the user selects a plan ('Pro Tier' - $29/mo), the Cloud Function generates a Stripe Checkout URL with your Price ID (price_1N...). The app opens the checkout URL in an in-app browser or Safari.
• Customer Portal: When users want to update their credit card, view past VAT invoices, or cancel their subscription, you launch Stripe's self-serve Customer Portal, saving hundreds of hours of custom billing UI code.
• Lifecycle Webhooks: When customer.subscription.deleted fires, your webhook immediately strips the user's premium claims, downgrading them cleanly.
Scenario 3: Stripe Connect (Multi-Vendor Marketplaces & P2P Splits)
Used for two-sided platforms like Airbnb, Uber, food delivery apps, or second-hand marketplaces where buyers pay the platform, and the platform pays out individual vendors while keeping a commission.
Step 1: Vendor Onboarding (Express Accounts)
Vendors (drivers, sellers, hosts) must connect their bank accounts through Stripe Express. Your backend generates an account link:
const accountLink = await stripe.accountLinks.create({
  account: sellerStripeAccountId,
  refresh_url: 'https://myapp.com/reauth',
  return_url: 'https://myapp.com/vendor-dashboard',
  type: 'account_onboarding',
});
Step 2: Destination Charges with Application Fees
When a customer purchases a $100 service, you retain a 15% platform fee ($15.00) and automatically route $85.00 to the vendor:
const paymentIntent = await stripe.paymentIntents.create({
  amount: 10000, // $100.00 in cents
  currency: 'usd',
  application_fee_amount: 1500, // $15.00 platform commission
  transfer_data: {
    destination: sellerStripeAccountId, // Vendor receives remaining $85.00
  },
});
Scenario 4: Pre-Authorization Holds & Deferred Captures
Crucial for car rentals, ride-hailing chauffeur platforms, hotels, and tasker services where the final cost cannot be known until the journey concludes.
If a rider requests a trip estimated between $35 and $50, you must authorize a hold on their card to guarantee funds, but delay capturing until the driver marks the journey completed:
// 1. Authorize Hold on Passenger Card
const holdIntent = await stripe.paymentIntents.create({
  amount: 5000, // Authorize $50.00 maximum estimated fare
  currency: 'usd',
  customer: passengerStripeCustomerId,
  capture_method: 'manual', // Holds funds without capturing!
});

// 2. Capture Exact Final Fare upon ride completion
// If actual metered trip was $38.25:
const captured = await stripe.paymentIntents.capture(holdIntent.id, {
  amount_to_capture: 3825, // Captures $38.25 and releases remaining $11.75 automatically!
});
Webhook Security: Verifying the HMAC Signature
Never process order fulfillment based on the client device reporting "payment successful". Mobile apps can be patched. Always listen for Stripe's official server-to-server webhook: payment_intent.succeeded, verifying the cryptographic signature with stripe.webhooks.constructEvent.
Need Stripe Configured for Your App?
At KinetixSoft, our certified backend and FlutterFlow engineers build zero-leak Stripe architectures compliant with PCI-DSS standards. Schedule a technical architecture call with our team.
Planning to build an app like this?
KinetixSoft designs, builds, and launches production-grade mobile and web applications on FlutterFlow, Bubble, Retool, Lovable, and Podio. We deliver 40–60% faster and more affordably than traditional agencies.
Book a Free Scoping CallRelated Guides & Articles
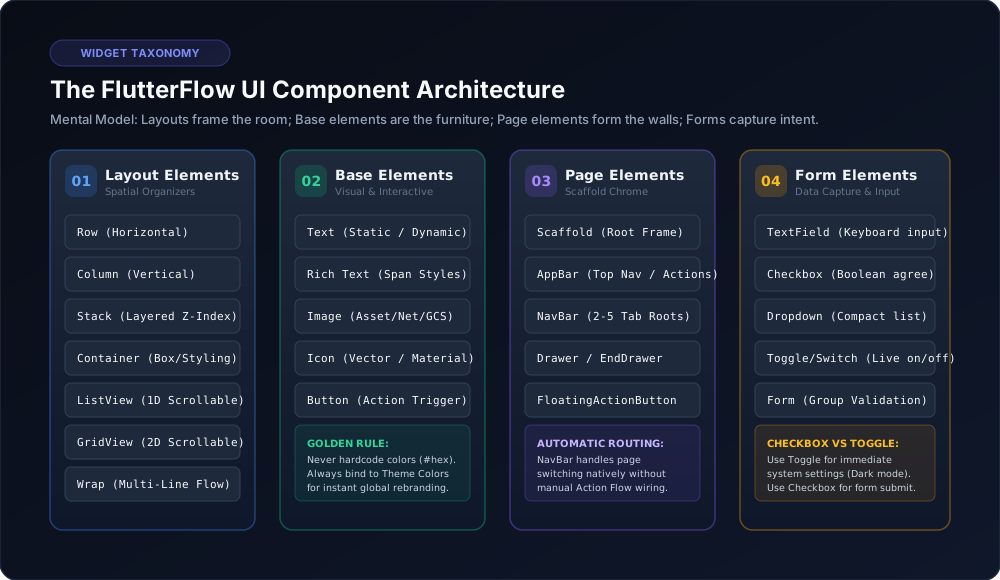
The Complete FlutterFlow UI Widget Reference: Properties, Best Practices & Architecture Gotchas
The Ultimate FlutterFlow Beginner Guide (2026): From Visual UI to Production App Store Launch